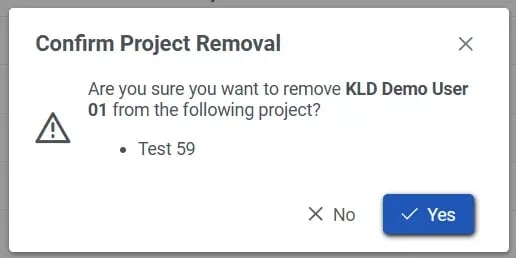
Accessing User Management
From any page, click the Portal Management icon in the tool bar and select User Management.
The User Management tab lists all users who currently have access to projects where you have been assigned the Project Admin role.
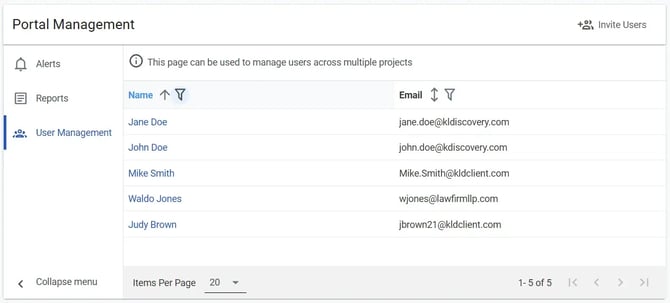
Viewing User Details and Projects
-
From the User Management tab, click on the name of the user you would like to view.
-
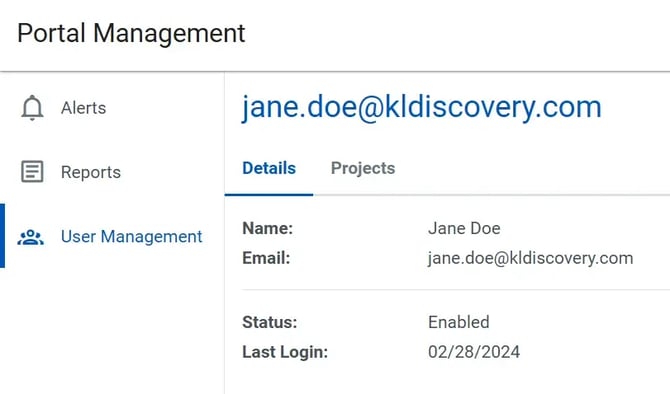
On the Details tab of the user's page, you can view information about the user and their account.
-
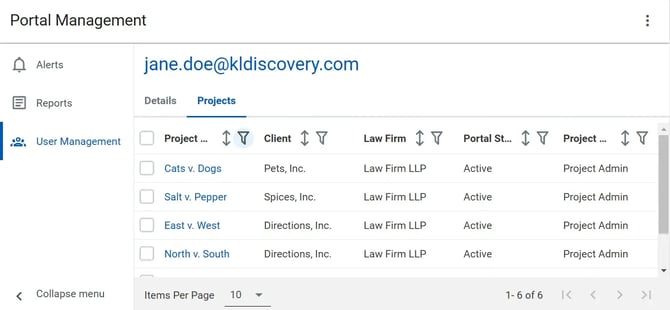
On the Projects tab, you can view a list of projects the user has access to where you have been assigned the Project Admin role. Additionally, you can see the user role that has been assigned to that user in each project.
Granting Project Access
Inviting New Users By Manually-Selecting Projects
-
From the User Management tab, click on the Invite Users button in the toolbar.
-
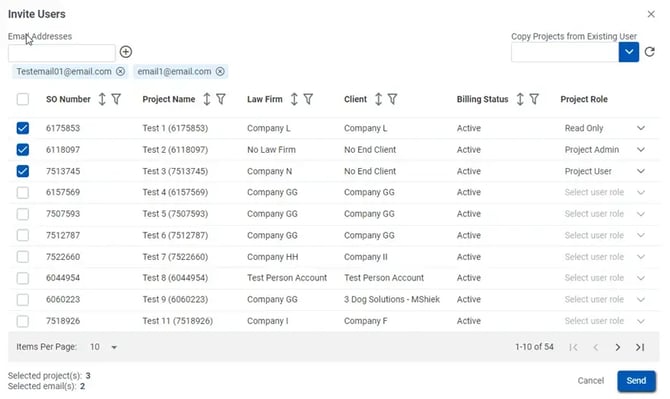
On the Invite Users dialog box, add one or more email addresses.
-
Multiple addresses can be added at the same time by separating them with semicolons, commas, or spaces.
-
-
Once you have added all the e-mail addresses desired, select those project(s) to which they should be invited by checking boxes in front of each project.
-
By default, the new user(s) will be assigned the Advanced User user role. If you would like the user(s) to have a different role, change it by using the drop-down menu in the Project Role field for each project.
-
-
Once the user(s) have been assigned the appropriate user role for each project, click the Send button.
-
The user(s) will receive e-mail invitations and access to the project(s) selected.
-
Inviting New Users By Copying from Existing User
-
Enter the e-mail addresses of the user(s) you would like to invite by following steps 1-2 in By Manually Selecting Projects above.
-
In the Copy Projects from Existing User drop-down menu, select the name of the user whose project access you would like to copy to the new user(s).

-
Confirm the selected projects and user roles are correct.
-
Click Send.
-
The user(s) will receive e-mail invitations and access to the project(s) selected.
-
Granting Existing Users Access to New Projects
-
From the User Management tab, locate the user you would like to edit and click on the link in the Name field.
-
On the user's page, click on the Add Projects button in the tool bar.
-
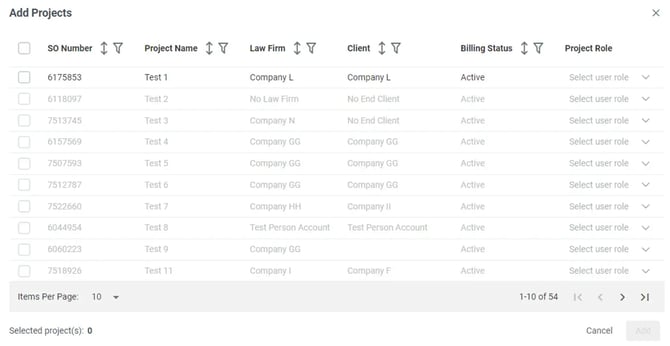
On the Add Projects dialog, select those project(s) the user should be added to.
-
In the Project Role field, select the user role that the user should be assigned in each project.
-
By default, the new user(s) will be assigned the Advanced User user role. If you would like the user(s) to have a different role, change it by using the drop-down menu in the Project Role field for each project.
-
Projects that the user already has access to will be grayed out and unavailable for selection.
-
-
Click Add.
-
The user(s) will receive e-mail invitations and access to the project(s) selected.
-
Modifying User Access
Changing a User's Role - Single Project
-
From the User Management tab, locate the user you would like to edit and click on the link in the Name field.
-
On the Projects tab, hover over the row for the project with the user role you want to modify and click the Edit Role icon.
-
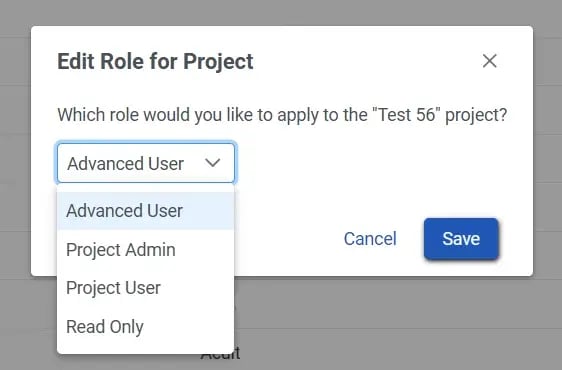
On the Edit Role for Project dialog box, select the user role you would like to apply.
-
Click the Save button.
Removing Project Access
-
From the User Management tab, locate the user you would like to edit and click on the link in the Name field.
-
On the Projects tab, hover over the row for the project which you would like to remove and click the Remove Project Access icon.
-
On the Confirm Project Removal dialog box, review the information and confirm removal by clicking on the Yes button.