
Adding/Inviting Users
-
On the Client Portal dashboard, select the project you want to invite the user(s) to.
-
From the project page, click the Portal Users tab.
-
In the Portal Users tab header, click Invite Users.
-
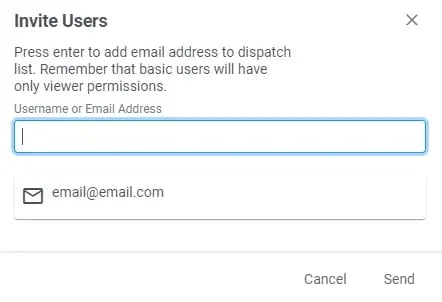
On the Invite Users dialog box, enter the user's e-mail address press enter to add them to the dispatch list.
-
Continue to add additional e-mail addresses to the dispatch list as desired.
-
Click Send to e-mail invitations to all the addresses on the dispatch list.
Users invited will receive e-mails prompting them to register for Client Portal. Users will be granted the Advanced User user role by default. If a user requires a different role, it should be updated immediately after they are added.
Removing Users
Removing a Single User
From the Portal Users tab, hover over the row for the user you want to remove from the project.
Click the trash can icon at the end of the user's row.
On the "Are you sure you want to remove this user?" dialog box, click Ok to remove the user.
Removing Multiple Users
-
From the Portal Users tab, select the users you would like to remove by clicking the check box in front of the user's name.
-
Once you have selected all users, click the trash can icon in the blue header that appears above the list of users.
-
On the "Are you sure you want to remove these users?" dialog box, click Ok to remove the users.
Updating User Roles
-
From the Portal Users tab, find the row for the user(s) whose role you would like to update.
-
In the drop-down box in the Role column for each user, choose the appropriate role for the user.
-
Once you have updated the role for the desired users, click the Save button above the user list to apply the new roles.