Accessing Reports
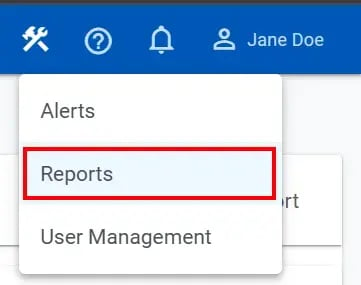
Reports can be accessed via the Reports tab of the Portal Management page. You can access this page by clicking on the Portal Management icon in the top right corner of any page and selecting Reports. From here, you can create new reports, edit existing reports, export reports, and delete reports.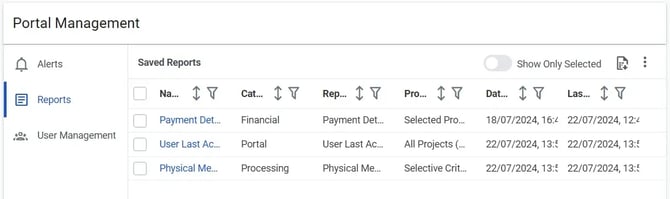
The list of reports on the Reports tab can be sorted and filtered using the controls in the column headers. Additionally, a CSV file containing a list of the reports and their metadata can be exported by clicking on the Export CSV button in the toolbar above the list.
Reports exist at a user level and you can only access reports that you have created. Other users cannot view, access, or edit reports that you have created.
Creating Reports
-
Navigate to the Summary tab of your project, and click on the Create Report button in the top right corner of the page.
-
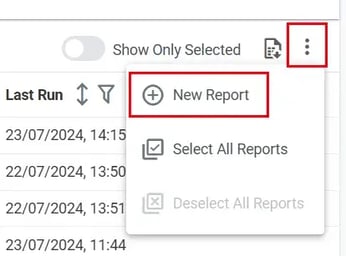
Alternatively, navigate to the Reports tab of the Portal Management page, click the Action button above the Report List, and select New Report.

-
-
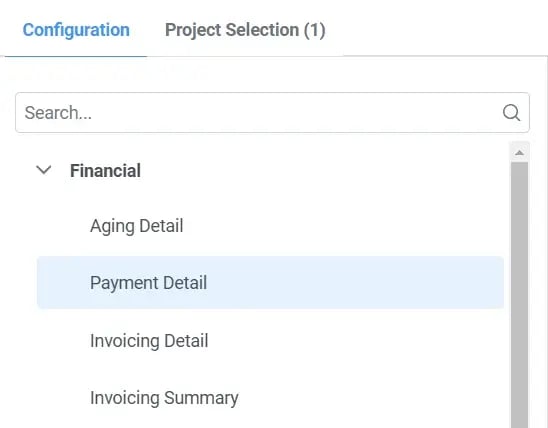
On the Create Report dialog Configuration tab, select the type of report you would like to generate.
-
For details on the types of reports available, see Available Reports.
-
-
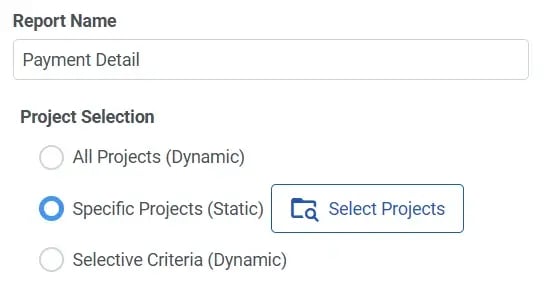
Enter a Report Name and choose which projects should be included in the report using the Project Selection field.
-
All Projects (Dynamic)
-
Reports on all projects that you have access to.
-
-
Specific Projects (Static) - Default
-
Reports on a defined, static list of project as set on the Project Selection tab.
-
-
Selective Criteria (Dynamic)
-
Reports on all projects that you have access to and which meet the filter criteria you set on the Project Selection tab.
-
-
-
Click the Create Report button to save and view the report. You can also click Preview to confirm the report matches your expectations given the settings provided, or Cancel to close the dialog without saving the report.
Copying Reports
Reports can also be created by making a copy of an existing report. Copies can be created by navigating to the Reports tab of the Portal Management page, selecting the Options button on the row of the report you want to copy, and selecting Copy.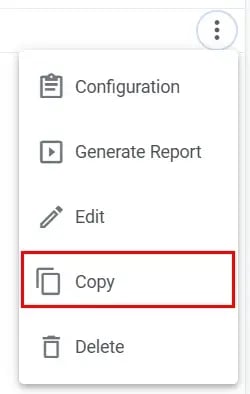
This will open the Create Report dialog, where you can configure the new report as needed.
Editing Reports
-
Click on the Portal Management icon in the top right corner of the page and select Reports.
-
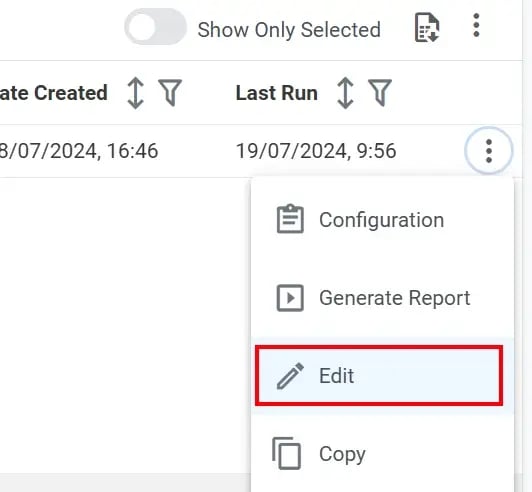
On the Reports tab of the Portal Management page, locate the report you would like to edit. Click the Options button (three dots) at the end of the row, and choose Edit from the action menu.
-
On the Edit Report dialog, configure the report as you would like and click the Save Report button. For information on the options available, see Creating Reports.
Exporting Reports
-
Navigate to the report from the Reports tab of the Portal Management page.
-
In the toolbar above the report, click on the Export CSV button.

-
Once the export is prepared, it will be automatically downloaded as a CSV file named for the name of the report.
Deleting Reports
-
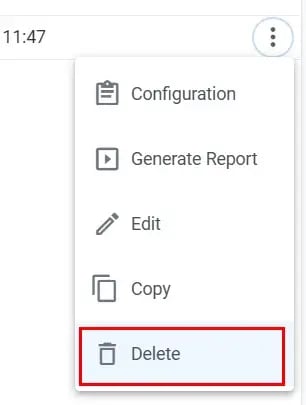
From the Reports tab of the Portal Management page, click on the action button on the report's row and select Delete.

-
Alternatively, you can open the report and click on the Delete button in the toolbar above the report.
-
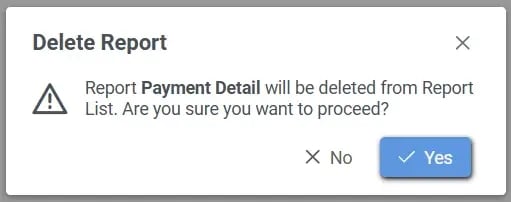
On the Confirm Report Deletion dialog box, click Yes.