Creating Alerts
There are multiple options available to begin the process of creating a new alert.
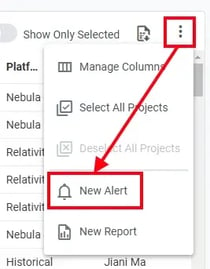
From the Dashboard
- Click on the Options button above the project list, and select New Alert.
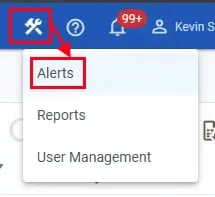
From Portal Management
- From the main tool bar, click the Portal Management button and select Alerts.
- From the Alerts tab of the Portal Management page, click either New Alert button.
From a Project Page
-
From the Project List on the Dashboard, click on the name of the project to navigate to the project page.
-
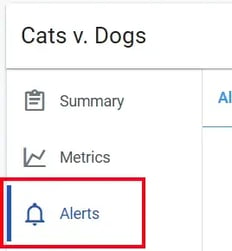
Navigate to the Alerts tab.
-
Click either New Alert button.
Copying Existing Alerts
In addition to creating alerts from scratch, alerts can be created by copying existing alerts. Copying an existing alert will open the New Alert dialog and prepopulate it with all of the configuration settings from the existing alert. To copy an existing alert:
-
From the Alerts List, click the Options button for the alert you would like to copy.
-
Select Copy from the Options menu.
-
Make changes to the alert configuration as desired and click the Create & Run or Create button.
Alert Configuration
-
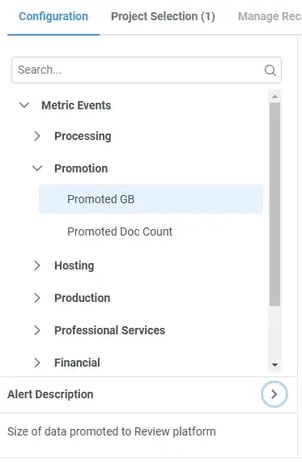
From the Configuration tab of the New Alert dialog, select the type of alert.
-
Alert types are organized into categories, and can be searched using the search box at the top of the list.
-
A description of each alert type can be viewed by clicking on Alert Description below the list.
-
For a complete list, see Alert Types.
-
-
Set a name for the alert using the Alert Name field.
-
Once you have selected an alert type, the Alert Name will be pre-populated with the alert type. You can customize the name as desired.
-
-
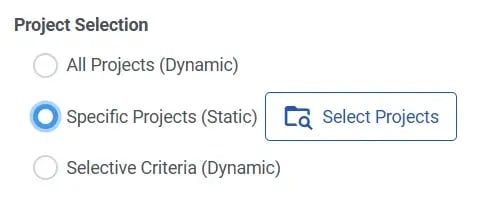
Select which projects should be monitored by the alert using the Project Selection field.
-
All Projects (Dynamic)
-
Monitors all of your projects.
-
-
Specific Projects (Static)
-
Monitors a static set of projects selected at the time the alert is created by clicking on the Select Projects button.
-
-
Selective Criteria (Dynamic)
-
Monitors a dynamic set of projects that is updated each time the alert is run, based on the conditions you specify at the time the alert is created by clicking on the Define Filters button.
-
-
-
Select the desired Notification Frequency, which will determine how often Client Portal should check if alert criteria are met and send notifications:
-
Immediately
-
Only available for Client Portal Events alert types.
-
-
Daily
-
Checks are run every day at 10 AM (Eastern - US and APAC / GMT - EMEA)
-
-
Weekly
-
Checks are run each Monday.
-
-
Monthly
-
Checks are run on the first day of each month.
-
-
-
Set additional configuration fields as needed. The fields required will change based on the alert type selected.
-
Enable Email Alert Notifications if desired. When enabled, Client Portal sends e-mails notifications in addition to logging the notifications in the Notification Center.
-
Click Create & Run or Create to create the alert.
-
Clicking Create & Run will immediately check for alert conditions and send notifications in addition to creating the alert.
Managing Existing Alerts
Alerts List
Once an alert is created, it appears on the Alerts tab of the Portal Management page in the Alerts List. Alerts are displayed in a paginated, tabular format that can be filtered and sorted similar to projects on the Dashboard.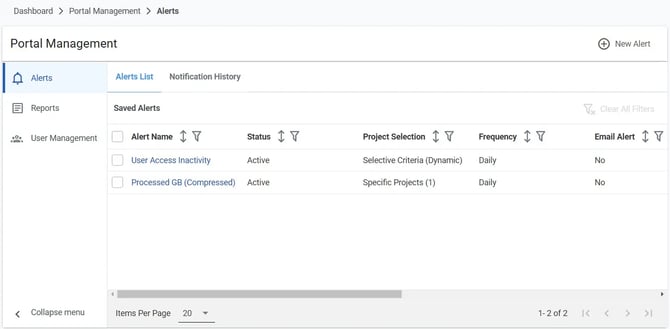
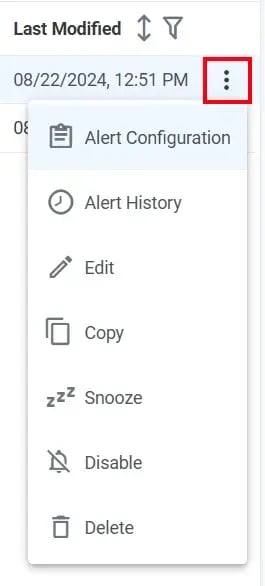
Clicking the Options button at the end of an alert's row will open a menu listing actions that can be performed on that alert.
-
-
Opens the Configuration tab for the alert.
-
-
Alert History
-
Opens the Notification History tab for the alert.
-
-
Edit
-
Opens the alert for editing.
-
-
Delete
Screenshot of Alert Options Menu
 Alert Configuration
Viewing Alert Details
By clicking on the Alert Name in the Alerts List, you can view details about the alert including the Configuration and Notification History tabs.
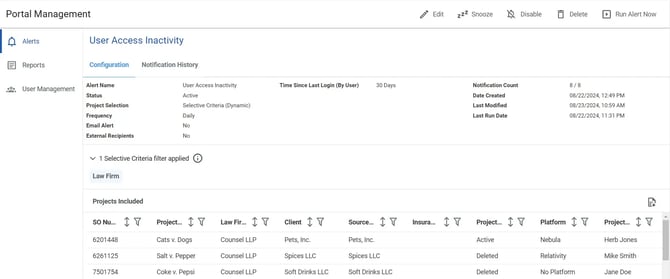
The Projects Included section will list all projects currently included in the alert. If the alert was configured with the "Selective Criteria (Dynamic)" option, the type of criteria used to filter the projects will also be displayed above the list of projects.
The toolbar at the top of the page can be used to perform actions on the alert, including:
-
Edit
-
Run Alert Now
Snoozing Alerts
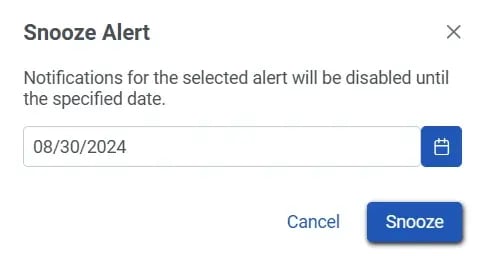
Snoozing alerts allows you to disable notifications related to an alert until a specified date. Once that date has been reached, the alert will become active again and begin sending notifications when conditions are met or exceeded. To snooze an alert:
-
Click the Snooze button on the alert's page in Portal Management, or select Snooze from the Options menu for the alert on the Alerts List.
-
On the Snooze Alert dialog box, select a date to snooze alerts until, and then click the Snooze button.
-
Once snoozed, the Status field of the alert will be updated to "Snoozed" and will also display the date when it will be re-activated.
Enabling and Disabling Alerts
Alerts are enabled by default when they are created. After creation, alerts can be disabled to stop the conditions from being checked and notifications from being sent until the alert is manually enabled again. To enable or disable an alert:
-
From the Options menu on the Alerts List, or from the toolbar on the alert's page, click Enable or Disable.
-
On the confirmation dialog, choose Enable or Disable.
-
Enabled alerts will display "Active" in the Status field, and disabled alerts will display "Disabled" in the field.
Deleting Alerts
Alerts can be permanently deleted if they are no longer needed. Existing notifications generated by the alert will remain available for review in Notification History after the alert has been deleted.
-
From the Options menu on the Alerts List, or the toolbar on the alert's page, click the Delete button.
-
On the Delete Alert confirmation dialog, choose Delete.